Changing your oil filter is like giving your car a fresh breath of air! It’s not rocket science, but you must roll up your sleeves. Let’s walk through it step-by-step:
Get Ready: First, ensure you’ve got the right tools and the new oil filter. You’ll need a wrench, an oil drain pan, and some gloves unless you don’t mind getting your hands dirty.
Warm Up: Start your car and let it run for a minute or two. This warms up the oil, making it flow easier. But watch out, don’t let things get too hot to handle!
Find Your Spot: Next up, find a good place to work. If you need to be on level ground, get there. Safety comes first, always.
Drain the Old Oil: Now, let’s get the old oil out. Locate the oil drain plug under your car and place your oil drain pan underneath. Unscrew the plug with the wrench and let the old oil exit. Remember, patience is key!
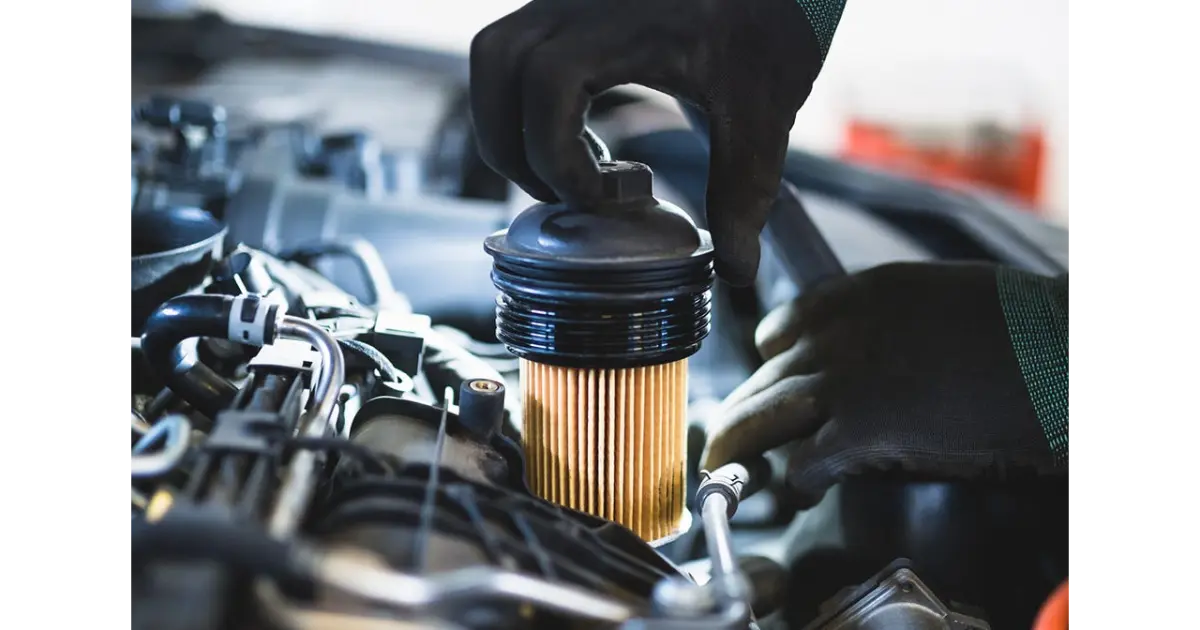
Out With the Old: While the oil is saying its goodbyes, let’s tackle the oil filter. Depending on your car, finding it could be a hide-and-seek game. Once you spot it, use your wrench to persuade it off gently. An elbow grease might be needed, but be careful not to Hulk out on it!
In With the New: Before putting in the new filter, dip your finger in the new oil and run it around the rubber seal of the new filter. This helps ensure a good seal. Now, screw the new filter in place by hand. There is no need to over-tighten; just a firm hand will do.
Plug It Back Up: The old oil’s journey should be complete now. Replace the drain plug the same way you took it out. It’s tight but not too close, like a firm handshake.
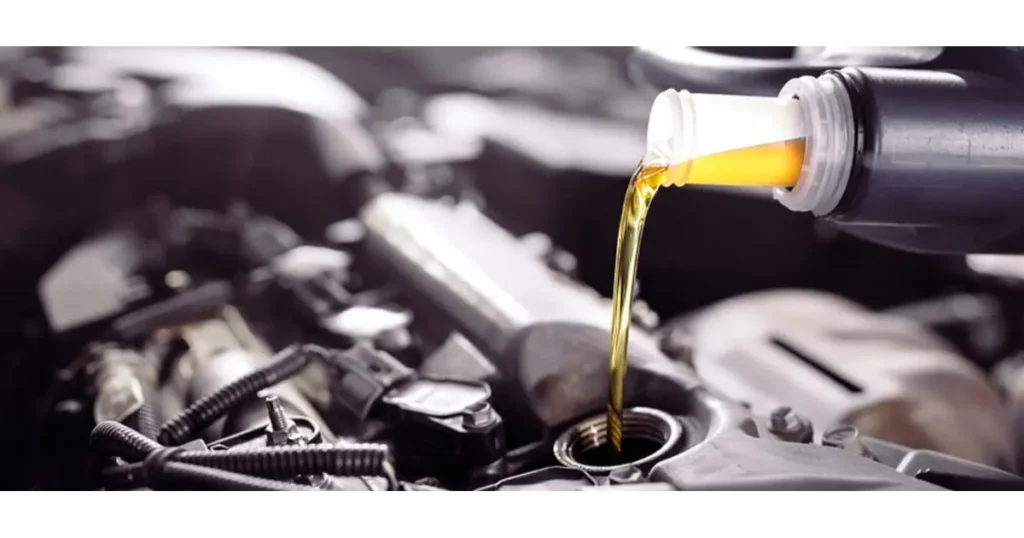
Fill ‘er Up: Almost there! It’s time to pour in the new oil. Check your owner’s manual for the right type and amount. Slowly pour it in, then check the level with the dipstick. You want to do just what is necessary.
Check and Double-Check: Recheck the level after giving the oil a few minutes to settle. Add more if needed. Look under the car, too, to ensure there are no leaks.
Clean Up and Recycle: Remember to clean up. Old oil and the used filter should be disposed of properly. Most auto shops will take them off your hands.
Introduction:
Welcome to the world of DIY car maintenance, where every task you undertake saves you money and deepens your understanding of your vehicle. Changing the oil filter is a quintessential skill among these tasks. It’s a fundamental aspect of car maintenance that ensures the longevity and efficiency of your engine.
In this blog post, we will embark on a detailed exploration of how to change an oil filter. While seemingly straightforward, this task involves nuances that can significantly impact your vehicle’s performance.
We understand that, for many, diving under the hood can be daunting. That’s why we aim to demystify the process, offering clear, step-by-step instructions that even a beginner can follow confidently.
Changing your oil filter is not just about the physical replacement; it’s about.
Exploring the Oil Filter:
The oil filter emerges as a crucial but often underestimated component in automotive maintenance. Its primary role? Keep the engine oil clean from contaminants that can cause significant damage over time. Understanding this component is critical to appreciating the importance of regular oil filter changes.
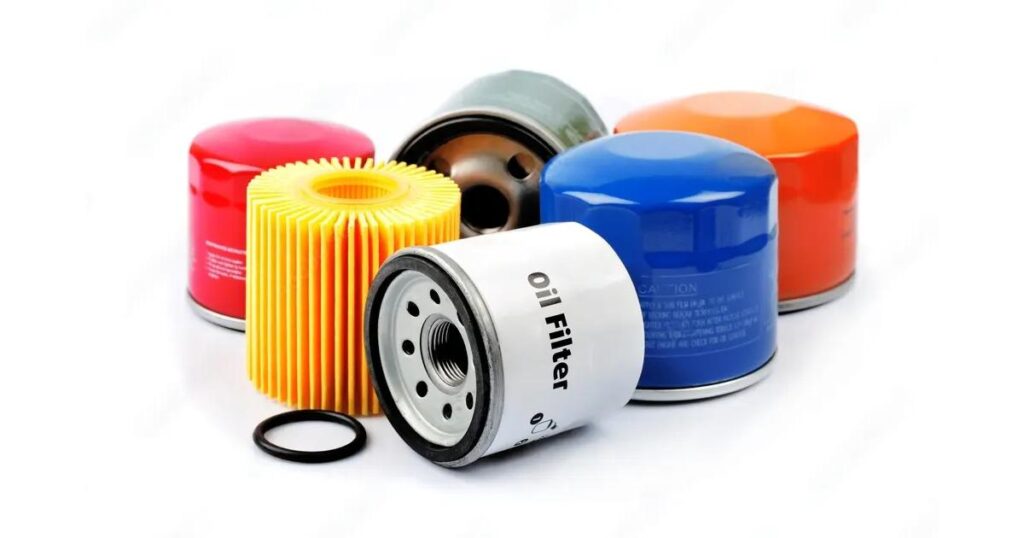
What is an Oil Filter?
An oil filter is a small yet vital part of your car’s lubrication system. It screens out dirt, metal particles, and other contaminants from the oil that can wear down your engine’s internal surfaces over time. Think of it as a sentinel, guarding your engine against the small but harmful particles that can lead to decreased efficiency and engine life.
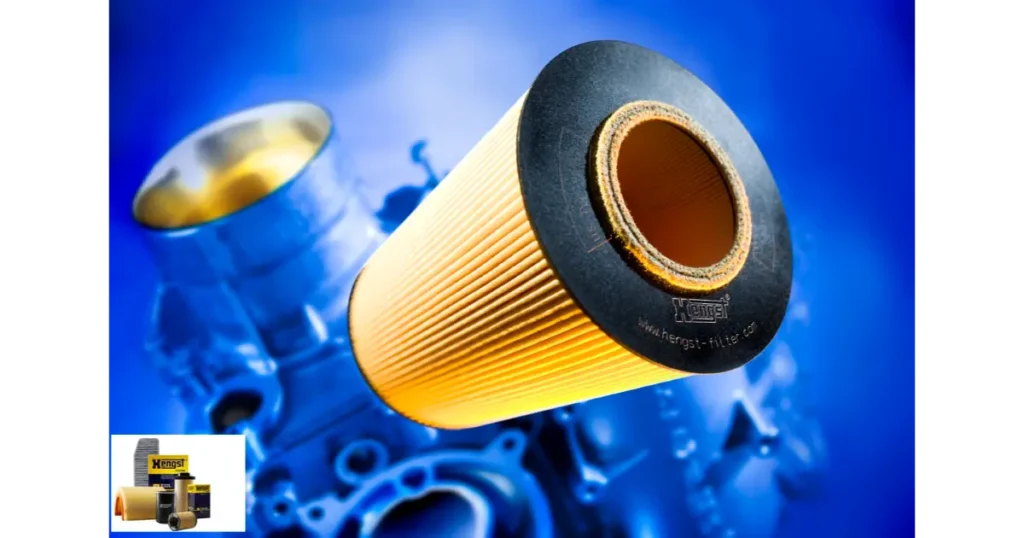
How Does It Work?
As engine oil circulates, it picks up various contaminants. The oil filter, typically located near the middle or bottom of the engine, acts as a purification system. As the oil flows through it, a media – usually made of synthetic fibers or pleated paper – traps these unwanted particles. The result? Only clean, debris-free crude makes its way back into the engine.
Why is Changing the Oil Filter Important?
Over time, the filter accumulates the contaminants it traps, which can clog it. A clogged filter no longer effectively cleans the oil, leading to reduced engine performance and potentially severe engine damage. Regularly changing the oil filter is crucial for maintaining optimal engine health and efficiency.
| Reason | Explanation |
| Engine Protection | The oil filter removes contaminants from engine oil that can wear down engine components. Clean oil means less friction and wear on the engine. |
| Maintains Oil Quality | Regularly changing the filter ensures that the oil remains clean, providing optimal lubrication and protection for the engine. |
| Improves Engine Performance. | A clean oil filter helps maintain efficient engine performance by ensuring the oil is free of debris that can hinder its flow and effectiveness. |
| Extends Engine Life | Changing the oil filter regularly helps maintain the engine’s efficiency, which can lead to lower emissions and a smaller environmental footprint. |
| Prevents Oil Flow Blockages | Over time, a dirty oil filter can become clogged, restricting oil flow. This can lead to increased engine wear, overheating, and, in severe cases, engine failure. |
| Cost-Effective Maintenance | Regularly changing the oil filter is a relatively inexpensive maintenance task that can prevent more costly engine repairs due to wear and tear from dirty or degraded oil. |
| Environmental Benefits | Changing the oil filter regularly helps maintain the engine’s efficiency, which can and lead to lower emissions and a smaller environmental footprint. |
The Lifespan of an Oil Filter:
Changing your oil filter every time you change your oil is recommended. This frequency ensures that your engine always has a clean filter, preventing any lapse in protection and performance. However, the exact interval can vary based on vehicle type and usage patterns, so consulting your vehicle’s manual is always a good idea.
Introduction to the Process:
Changing your oil filter is an integral part of vehicle maintenance that ensures your engine runs smoothly and efficiently. This process, which might seem daunting initially, can be pretty straightforward once you understand the steps involved. Let’s break down the process into manageable, easy-to-follow stages.
Preparation:
- Gather the Right Tools and Materials:
- A new oil filter compatible with your vehicle.
- Engine oil.
- Wrench set.
- Oil drain pan.
- Funnel.
- Rags or paper towels.
- Safety gloves and glasses.
- Vehicle Preparation:
- Ensure your car is parked on a level surface and the engine is excellent.
- Engage the parking brake for added safety.
Draining the Old Oil:
- Locate the Oil Drain Plug:
- Find the oil drain plug under the vehicle and place the oil drain pan beneath it.
- Remove the Drain Plug:
- Using the appropriate wrench, carefully remove the drain plug. Allow the old oil to drain completely into the pan.
Removing the Old Oil Filter:
- Locating the Oil Filter:
- Identify the location, which can differ depending on your vehicle model.
- Unscrewing the Old Filter:
- Using an oil filter wrench, turn the filter counterclockwise to loosen and remove it. Be cautious, as residual oil may spill.
Installing the New Oil Filter:
- Prepare the New Filter:
- Before installing the new filter, lightly coat its rubber seal with fresh engine oil. This helps ensure a proper seal.
- Install the New Filter:
- Screw the new filter into place by hand. Avoid over-tightening, which can damage the filter or its seal.
Refilling Engine Oil:
- Replace the Drain Plug:
- Replat and tighten the drain plug once all the old oil has drained.
- Add New Oil:
- Remove the oil filler cap on top of the engine.
- Pour in the new oil using a funnel, as specified in your vehicle’s manual.
- Check Oil Level:
- After adding oil, wait a few minutes, then check the oil level with the dipstick. Add more oil if necessary.
Final Checks:
- Inspect for Leaks:
- Start the engine and let it run for a few minutes.
- Check under the vehicle for any signs of oil leakage.
- Dispose of Old Oil and Filter:
- Take the old oil and filter to a recycling center. Never dispose of oil in the trash or down a drain.
Key Takeaways:
Understand the Importance: The oil filter is crucial for keeping engine oil clean and protecting the engine from contaminants.
Gather Necessary Tools: Ensure you have the right tools, including a new oil filter, engine oil, wrench set, and safety gear.
Follow Step-by-Step Instructions: From draining the old oil to installing the new filter, each step is vital for a successful oil filter change.
Safety and Precision: Always work on an excellent engine and level ground for safety. Precision in each step ensures a successful oil filter change.
Dispose Responsibly: Properly dispose of the used oil and oil filter to protect the environment.
FAQs:
How often should I change my oil filter?
Generally, it’s recommended to change your oil filter with every oil change, typically every 3,000 to 5,000 miles. However, consult your vehicle’s manual for specific recommendations.
Can I change the oil filter without changing the oil?
While possible, it’s best to change both simultaneously to ensure the cleanest and most efficient operation of your engine.
Do I need a professional to change my oil filter?
Not necessarily. Most people can change their oil filters with the right tools and guidance.
How do I dispose of the old oil filter and oil?
Take them to a recycling center or a garage that accepts used oil and filters. Never dispose of them in the trash or down a drain.
What if I find a leak after changing the oil filter?
Check if the filter and drain plug are correctly tightened. If the leak persists, consult a professional.
Conclusions:
Changing your oil filter is a rewarding DIY task that enhances your vehicle’s performance and longevity. With the right tools, knowledge, and a can-do attitude, anyone can master this essential aspect of car maintenance. Regular oil and filter changes are vital to keeping your engine in shape.